In this guide, we will walk you through the process of adding Polygon to MetaMask using two methods: Polygonscan and manual setup. Additionally, we will explain how to add MATIC tokens to MetaMask. Continue reading to find out more.
Method 1: Adding Polygon to MetaMask with Polygonscan
Step 1: Open Polygonscan
Start by visiting the Polygonscan website.
Polygonscan functions as a blockchain explorer specifically designed for Polygon, similar to Ethereum's Etherscan. It allows you to explore Polygon addresses, tokens, transactions, and more.
Step 2: Click on the "Add Network" Button
Locate the bottom-right corner of the Polygonscan page. There, you will find a MetaMask icon accompanied by a button labeled "Add Polygon Network."

Before proceeding to click the "Add Polygon Network" button, make sure you are logged in to your MetaMask account.
Step 3: Verify the Connection Request
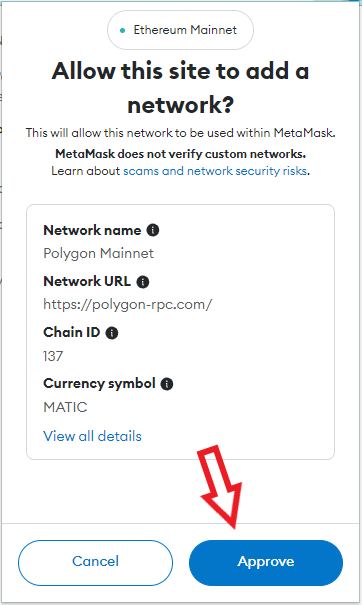
When using MetaMask to connect with different decentralized applications (dApps), it's important to be cautious as anyone with your address can attempt to connect to your account. To ensure security, MetaMask requires users to personally verify all connection requests.
A MetaMask window will appear, displaying the connection request. Simply click on the "Approve" tab to confirm the connection.
That concludes the process of adding Polygon to MetaMask through Polygonscan. If you are currently using a different network on MetaMask, you also have the option to switch from your existing network to Polygon.
Method 2: Adding Polygon to MetaMask Manually
If you prefer to add Polygon to MetaMask manually, this alternative has four basic steps:
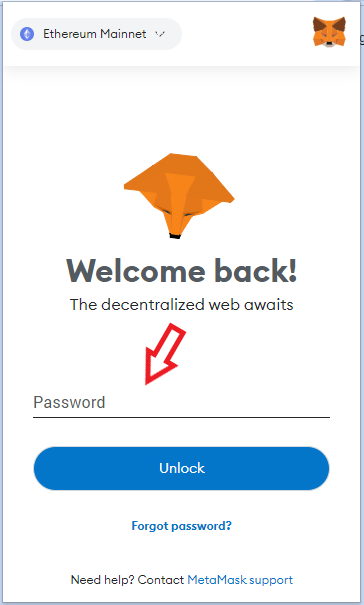
Step 1: Access MetaMask
To begin, click on the MetaMask icon located at the top-right corner of your browser. This will open your MetaMask wallet. Proceed to sign in using your credentials.
Step 2: Add the Network
Once you are logged into your MetaMask wallet, locate the network selection button at the top of the interface. By default, MetaMask is set to the Ethereum network.
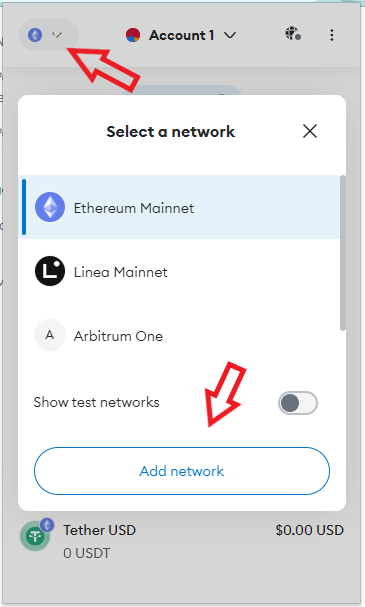
Click on the tab labeled "Ethereum Mainnet," and a dropdown menu will appear, displaying all the networks you have previously added. To proceed, select "Add Network," which will open a new window.
Step 3: Enter Polygon Network Details Manually
Enter the details below in their respective fields:
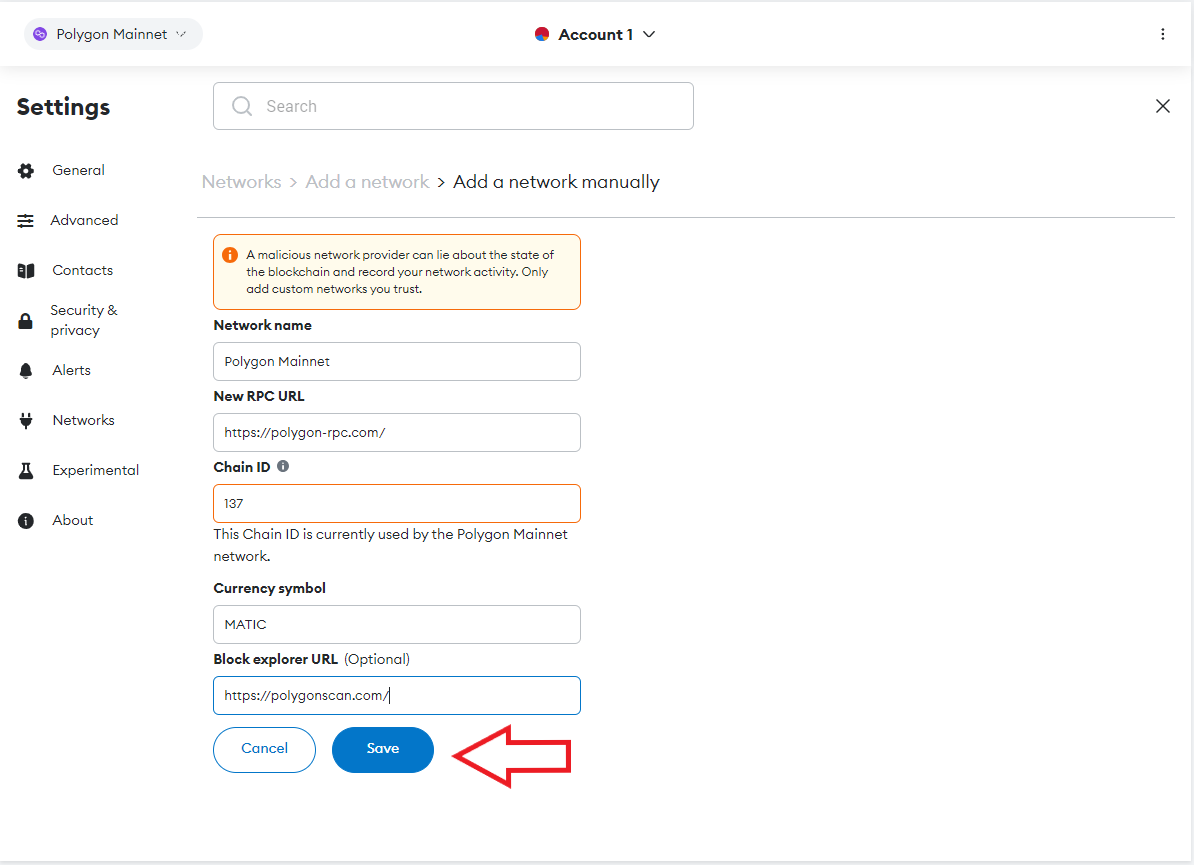
Network Name: Polygon Mainnet
New RPC URL - https://polygon-rpc.com/
Chain ID: 137
Currency Symbol: MATIC
Blockchain Explorer URL (optional): https://polygonscan.com/
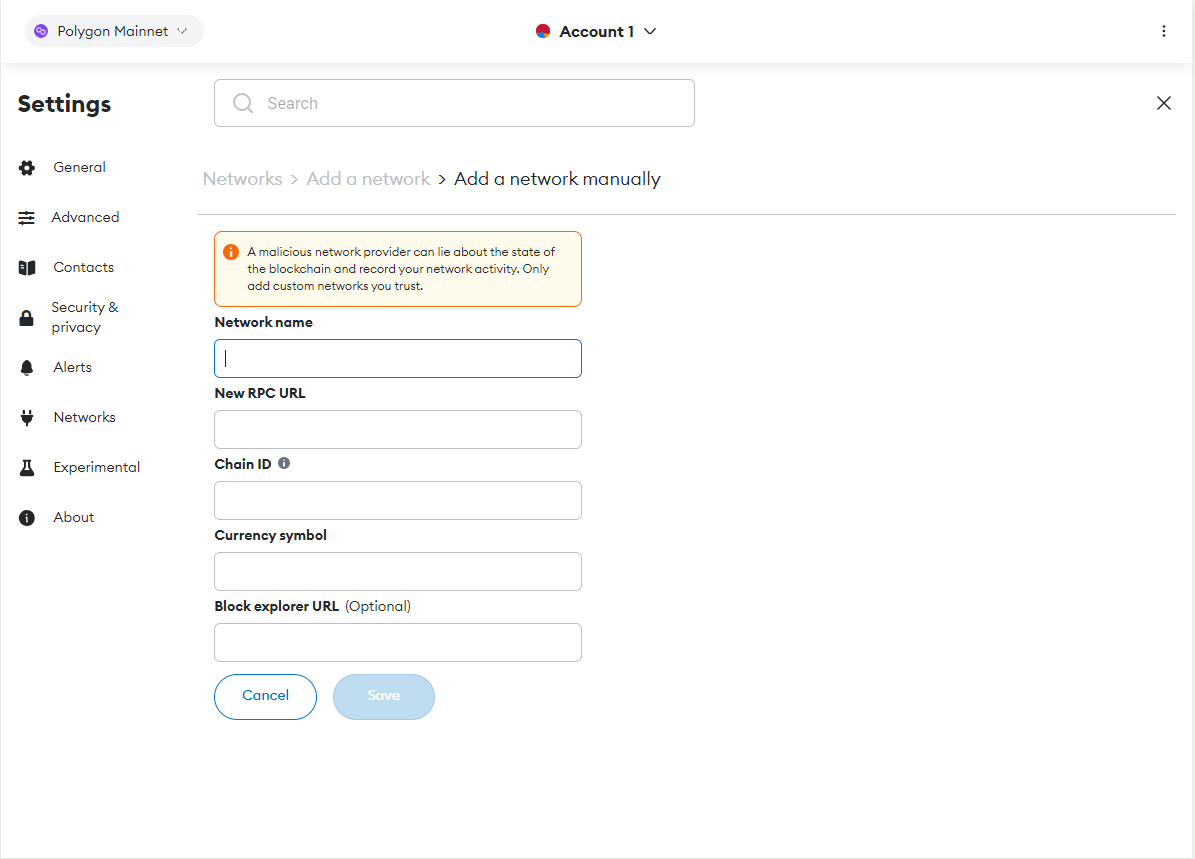
TIP: To avoid potential errors while entering the details, it is advisable to copy and paste each of them individually into their corresponding fields.
Step 4: Click the “Save” Button
Once you've filled in the details, the “Save” button on the bottom turns blue. Click it to save your entries and add the Polygon network to MetaMask
Once completed, your Mainnet network will be set to Polygon Mainnet.
To switch between networks, simply click on the Mainnet Network menu.


.png)
.png)
.png)
.png)
.png)